NEWS & EVENTS

- Home
- News
- Products Information
- Paint Bleeding: Causes and How to Fix It
Paint Bleeding: Causes and How to Fix It
May 19,2026

During paint application and manufacturing, paint bleeding ranks among the most frustrating technical defects. It not only seriously damages the aesthetic quality of a finished surface but also demands significant time and material costs to correct. To help contractors, painters, and paint manufacturers optimize coating quality, APEX Vietnam provides this in-depth analysis - covering the root causes and practical solutions for eliminating this defect.
What Is Paint Bleeding?
Paint bleeding is a phenomenon in which contaminants or old colorants present beneath the substrate surface - such as tannins in wood resin, bitumen, stains, or an existing paint system - become dissolved by the solvents in a newly applied coat. These substances then migrate upward through the film and discolor the finished topcoat.

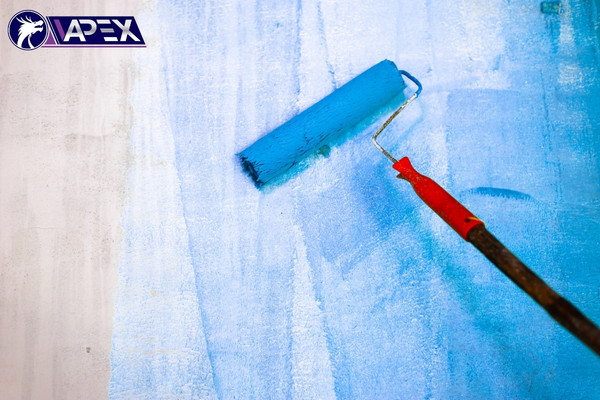
Paint bleeding defects cause patchy discoloration of the finish coat
Visually, bleeding in paint typically produces yellowish-brown streaks or rust-colored patches, or it may completely shift the hue of the new topcoat away from the intended design. Unlike paint peeling or film cracking, bleeding in paint originates from the nature of the substrate material and the chemical interaction between coating layers. For this reason, if the root cause is not properly addressed, the problem will continue to reappear no matter how many additional coats are applied.
Causes of Paint Bleeding
To permanently resolve paint bleeding, we need to analyze the multi-layer structure of a paint film and pinpoint exactly where the defect originates. The following are the core causes to be aware of.
1. Substrate Containing Soluble Contaminants
The substrate often harbors hidden risk factors. Natural wood continuously secretes wood resin (tannins). Old walls tend to accumulate smoke deposits and stains. Metal surfaces may contain oil, grease, or bitumen residues. When a new coat is applied, its solvents immediately dissolve these contaminants and draw them up to the surface.
2. Use of an Unsuitable Primer
A primer functions as a "lock coat" that prevents substrate contaminants from migrating upward. However, if a low-quality primer lacking stain-blocking properties is used, this protective function is lost. A primer coat that is applied too thinly or is incompatible with the substrate allows contaminants to pass through with ease, triggering paint bleeding.
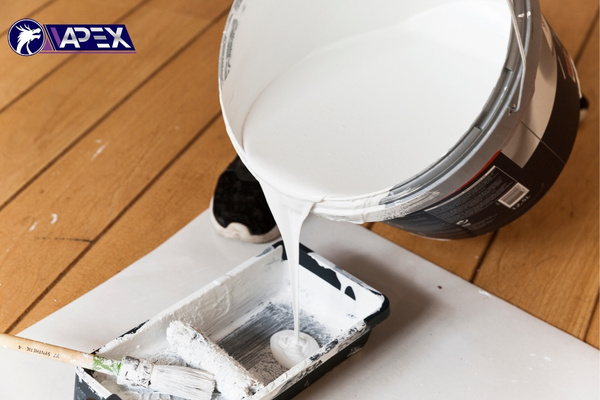
Substandard base coat and primer cause bleeding paint defects
3. Insufficient Drying Time Between Coats
A common application error is shortening the waiting time between coats to accelerate the schedule. When the next coat is applied before the primer has fully cured, the solvents from the two layers interact, directly activating the color migration process from the substrate into the topcoat. Painters must also account for environmental conditions - high humidity, low temperatures, and poor ventilation all extend the actual drying time well beyond the theoretical drying time stated on the product label.
4. Unstable Paint Formula or Composition
From a materials engineering standpoint, paint bleeding can also stem from an unoptimized paint formulation:
- Bleed-prone pigments: Certain organic pigments - particularly deep reds, oranges, and yellows - have small molecular structures that are easily dissolved and carried upward when exposed to solvents from a fresh topcoat.
- Weak binder system: A binder that lacks sufficient film-forming strength fails to anchor pigment particles, leaving them free to migrate with the solvent.
- Non-uniform pigment dispersion: When pigment is not evenly dispersed within the resin matrix, areas of high pigment concentration are particularly vulnerable to being drawn upward by external solvent action.
- Insufficient filler content or poor color-lock capability: Without adequate filler, the paint system lacks the physical mechanism needed to prevent pigment from penetrating through the film.
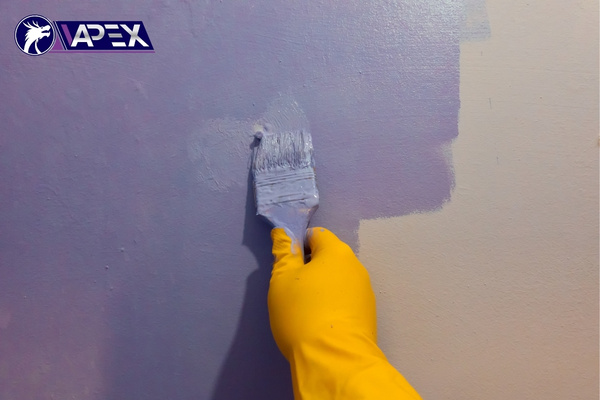
The paint's composition and formulation are unstable, causing bleeding paint defects
How to Identify Paint Bleeding
Applicators can quickly identify paint bleeding by watching for the following characteristic signs:
| Sign | Detailed Description |
|---|---|
| Yellowish-brown streaks | Appear on white or light-colored topcoats; typically visible within 24–72 hours after application. |
| Uneven color patches | The finished coat changes color non-uniformly, creating abnormal light and dark zones. |
| Color shift over time | The paint gradually yellows or dulls over several days to weeks. |
| Irregularly shaped affected areas | Commonly appears around wood knots, cracks, or areas with prior staining. |
| Strange odor or tacky surface | Indicates resin or oil still migrating upward and not yet fully set. |
Important note: Bleeding in paint can be confused with UV yellowing or mold staining. The key distinction is that bleeding in paint typically appears locally in areas with a contaminated substrate, whereas UV yellowing tends to spread uniformly across the entire surface.
How to Fix Paint Bleeding
Resolving paint bleeding requires contractors to apply a coordinated set of technical solutions. The steps below should be performed in sequence to restore the quality of the coated surface.
Step 1: Surface Preparation and Cleaning
A surface that has not been thoroughly cleaned will continue to cause bleeding in paint regardless of whether a new primer or topcoat is applied.
- Remove residual contaminants: Use an appropriate solvent - white spirit, isopropyl alcohol, or a dedicated resin remover - to clean away oil, grease, tree resin, and organic stains.
- Treat tannins on wood: For wood surfaces with high resin content, apply a dedicated tannin-blocking solution before priming.
- Sand and remove dust: Old walls should be thoroughly sanded with fine-grit sandpaper (P150-P220), then wiped clean with a damp cloth or vacuumed before application.
- Ensure the surface is completely dry: Surface moisture content must be below 14% (for wood) and below 80% relative humidity (for walls) before applying the next coat.

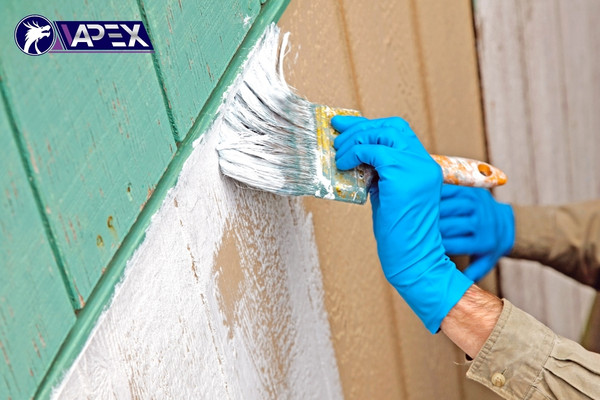
Surface Preparation and Cleaning
Step 2: Apply a Stain-Blocking Primer
A specialized primer is the most effective tool for preventing paint bleeding once the surface has been properly cleaned:
- Prioritize an oil-based primer or shellac-based primer for high-risk surfaces such as resinous wood or surfaces with severe prior staining.
- Apply the primer at the full thickness recommended by the manufacturer, as this layer determines the overall quality of the finished paint film.
- Ensure the primer is fully cured - not just surface-dry, but dry throughout the full film thickness - before applying the topcoat. The actual waiting time must be adjusted based on the temperature and humidity conditions at the job site.
Apply a Stain-Blocking Primer
Step 3: Follow Standard Application Procedures
Disciplined application protects the paint film from adverse environmental effects. Contractors who implement the correct technical specifications and painters who adhere to application protocols will eliminate the most common risk factors:
- Do not shorten the drying time between coats.
- Control environmental conditions: The ideal temperature range is 15-35°C with relative humidity below 85%. Do not apply paint in rain, high humidity, or strong direct wind.
- Test on a small area first: Before full-scale application, always apply to a 0.5-1 m² test area and observe for 48-72 hours to detect potential issues early.
- Always follow the manufacturer's technical data sheet exactly.
Follow Standard Application Procedures
Step 4: Optimize the Paint Formula and Select the Right Additives
For paint manufacturers and large-scale contractors, optimizing the paint formulation is the most fundamental preventive solution. Engineers should incorporate advanced additives to strengthen the coating system. The table below compares the key chemical components and their effectiveness:
| Chemical Component | Function | Effectiveness Against Bleeding |
|---|---|---|
| Dispersing additive | Optimizes the dispersion of pigment particles throughout the solution. | Prevents localized pigment bleed. |
| Binder system | Provides high resin content for strong film formation. | Creates a firm color-lock film that fully isolates substrate contaminants. |
| Filler | Fills capillary channels and micro-pores in the substrate surface. | Enhances surface coverage and reduces solvent and tannin penetration. |
APEX Vietnam is committed to supporting partners in building durable, aesthetically superior surface solutions. We supply a portfolio of high-quality resin additive materials designed to enhance color-locking performance and stabilize the polymer network structure of paint films. Our experienced technical team directly assists customers in optimizing manufacturing formulations to eliminate paint bleeding defects at the blending stage.